
Soil sampling is the process of collecting soil from a field to be tested. The test results can provide information on the soil’s ability to support crops.
Soil sampling strategies are often recommended by OSU Extension publications and may include point, cell or zone sampling. Choosing the correct sampling pattern will ensure that your soil testing results accurately represent the variability in the field.
Sampling Techniques
Selecting the correct sampling technique is essential to a successful soil sampling. Site-specific sampling techniques are cell, zone and point sampling approaches as well hybrids. These methods vary in the way a field is divided up into zones, and where within these zones samples are taken. Each of these approaches require prior knowledge of a field’s variable, as this can have a significant impact on the results obtained in a laboratory.
In order to accurately represent the soil’s nutritional status, soil samples must be taken as near to the surface as is possible. If you are using a soil sampler, be careful not to take samples with growing plant material attached or in the immediate vicinity of the root ball of existing vegetation. Avoid taking soil samples in areas that are wet or bare. Also, if the soil has been treated with lime or fertilizer, it is important to exclude these sites from the sampling area.
It is important to collect 15 to 20 soil samples in a field. A composite sample should represent an area of two to five acres. The sampling pattern should be designed in such a way that no single sample sent to the lab contains less than 10 cores, or less than 2.1/2 acres.
In general, a soil sample should be powdered and sieved after being dried on a clean sheet in the shade, to remove any roots and larger rocks. The resulting material is then placed into a clean plastic sample bag and labeled appropriately. The information sheet should include the sample number, as well as the GPS coordinates of where the sample was collected.
A key component of this process is giving each sample a unique identification number and entering it into the laboratory soil sample register. This allows the nutrient recommendations to be tied back to each specific location within the field and, if variable rate nutrient application is being used, to track changes in soil health over time.
Sampling Tools
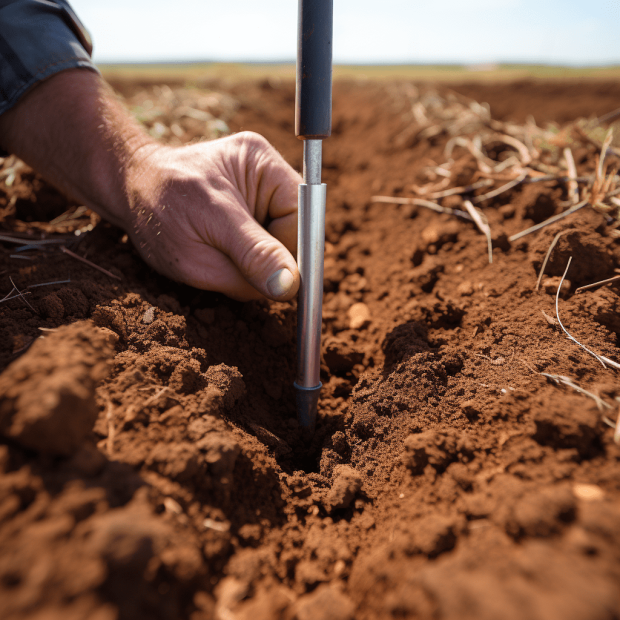
For soil sampling, you can use a variety of tools. These tools range from a simple hand-held probe to a gas powered auger that allows for greater depth penetration into the soil. The tool to be used depends on soil type, sampling objectives and the desired level detail.
For example, hand-held probes are usually shorter, single-unit devices that agronomists and growers commonly use to obtain the routine shallow soil samples needed for fertility and nematode analysis. They can be used in a wide range of soil types and conditions, and provide a reliable sampling with minimal effort.
A rotary sampler is another tool that can be utilized to collect deeper core samples from hard-packed soils and clay-like materials. It has a rotating pointer with a shaft that can be moved in and out of soil to take samples. Markings are on the shaft that indicate the probe’s depth. These tools are more precise than hand-held probes, but require more strength and endurance.
Powered augers allow for deeper penetration of tougher, rocky and sandier soils. These are more expensive than their manual counterparts, but can be used to obtain a larger number of core samples in less time. Augers can be fitted with handles and extensions to increase the depth of penetration. They also make it easier to use in difficult soils.
Other soil sampling equipment includes Shelby tubes, which are hollow, thin-walled steel tubes that can be driven into the ground to extract soil for testing. These tubes can test soils for a number of properties, including density, bulk density, compaction, or Atterberg limits. Other sampling accessories include extensions, handles and replacement tips for these tubes.
To reduce the time spent collecting soil sample, field managers can use technologies like zone or grid samples to identify trouble spots. They can then divide the field into smaller zones to allow for more targeted sampling. This can ensure that all areas in the field are tested, as well as avoiding sampling “hot spots” such around gates, manure piles, or water troughs which may have more of an impact on soil quality.
Sampling Sites
It is important to use a sampling plan, and the right equipment, to collect soil samples. Depending on your project’s scope, planning can take quite a bit of time. It is best to start early in the spring, before your fieldwork begins. Make sure that your field sampling team is properly trained. Purchase the necessary sampling equipment and containers, as well as screening test kits. Make sure that all equipment is ready for use and clean.
Be sure to keep your sampling sites free of debris and tillage. If possible, grid cell sampling will provide the most accurate and reliable result. Grid cells must be sized to reflect variations in soils and cropping systems as well as management practices.
The most common types of sampling equipment include open-sided soil-sampling tubes (Veihmeyer tubes), thin-walled tube samplers, and split-barrel drive augers. Most of these tools have liners, which help reduce contamination from metal instruments and hand contact. Use the liners as much as possible and use a tool that is easy to clean (e.g. stainless steel) in order to avoid contamination by fertilizer residue.
Most soil test laboratories offer GIS or FMIS software packages to design prescription rate maps and to select sampling sites. FMIS software is a subset GIS software that may be easier to understand and use.
It is advisable to select and record the locations of each soil sample site in a map or on a sketch. This allows you to track the results of previous soil nutrient management and progress over time. It also allows you to monitor and manage specific problem areas.
If possible, choose a sampling location within each grid cell that is close to the area of greatest need for lime and fertilizer application. This will reduce the number of trips required to cover a field.
To improve the representativeness of a soil sample, it is important to take more than one core per site. A minimum of ten cores is recommended. Collect cores in a number sites within the sampling area and thoroughly mix them. This will allow you to determine if the sample is representative of the field condition.
Sampling Procedures
Use chrome plated or stainless steel soil sampling probes and augers, avoid galvanized tools, and always use clean sample containers. Remember that the more cores collected from a particular area, the better representative your soil test will be. In a clean bucket, combine 15 cores of uniform depth and size. Label the bucket clearly, ensuring that all of your samples have the same identification number. Use the same identification on your soil testing information form.
If you sample your field using a grid, ensure that each sample represents the exact same amount of land in your grouping. The same principle applies if you are using zone sampling, although you might have more flexibility in selecting your sampling zones as long as the zones are of comparable size and location.
Avoid sampling immediately after applying fertilizer or lime, and be sure to wait a minimum of 30 days before sampling an alfalfa or other legume crop field. Also, do not take samples in wet areas or from sites that have had manure or other soil amendments applied.
Depending on which soil sampling method you use, your subsamples may need to be screened in order to remove organic material, stones, and roots. Once you’ve collected a composite soil test, a laboratory will be in a position to analyze its fertility and nutrient content.
You will need to use the information you have gathered from your soil test to determine what type of amendments you require and where they are most needed on your farm. Here, the expertise of local landcare groups or agronomists will be invaluable. Use your laboratory’s contact information to receive the best advice and support for your farm situation.